Accuracy, Precision And Error Analysis
Accuracy
All those observations taken by an instrument which are close to the actual value of a physical quantity are called actual values.
That is, the accuracy of a measurement is the value that tells us how close the measured value of a quantity is to its actual value.
Example
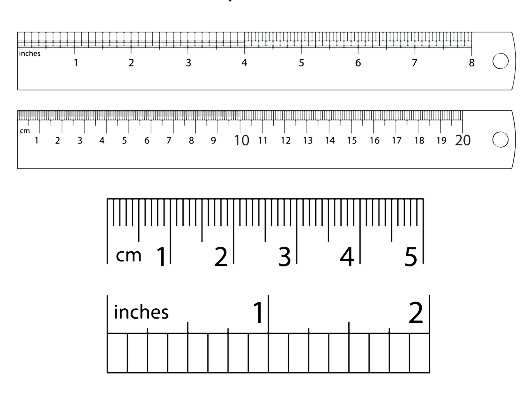
If the actual length of a rod is 5.346 cm, experimenter A measured the length of this rod as 5.3 cm with a meter scale whose least value is 0.1 cm and the other experimenter B measured the length of this rod as 5.24 cm with vernier callipers whose least value is 0.1 cm. .
Therefore, the length measured by experimenter A has greater accuracy and the measurement by experimenter B has greater precision.
Precision
All those observations taken by an instrument which are close to each other even if far from the actual value are called accurate values.
That is, precision tells to what extent the quantity has been measured.
Error
There is always some difference between the different values observed by a measuring instrument and the actual value of a physical quantity.
Therefore, the difference between the true value and the observed value is called error.
1.Sequential errors
2.Random errors
3.Absolute errors
4.Average absolute errors
5.Relative or fractional errors
6.Percentage errors
1.Sequential errors
Errors that occur regularly in an experiment are called systematic errors. This error is controlled by a certain rule or regulator and the main sources of this error are as follows:
(a). Mechanical errors
When an error occurs due to a measuring instrument, such error is called mechanical error.
Example-
If another resistance is added in parallel to the resistance of the volt meter in an electric circuit, the potential difference measured by the volt meter will be the angle of error.
(b). Imperfections in experimental technique or procedure
This error occurs when the observer is completely unaware of the changes taking place in the external environment.
Example-
In the use of calorimetry, heat loss due to radiation is inevitable, no matter how insulating the calorimeter is.
(c). Personal errors
When the main reason for the occurrence of an error is the carelessness of the observer, such errors are called personal errors.
2.Random errors
The existence of this error is due to the negligence or partial change of external environment. Along with this, it is an error that does not know the source.
3.Absolute errors
The actual value of a measured amount and the difference of the observation value is called the absolute error of this observation.
Therefore,
Absolute error = Real value ~ observed value
Suppose that the actual value of a physical amount is A and its value in observations, respectively, a₁, a₂, a₃, —— aₙ So absolute error of measurement
∆a₁=a~a₁
∆a₂=a~a₂
∆a₃=a~a₃
∆aₙ=a~aₙ
4.Average absolute errors
The parallel map of the absolute errors of different observations is called an average absolute error. So average absolute error,
∆a=(∆a₁+∆a₂+∆a₃+———+∆aₙ)/n
5.Relative or fractional error
The proportion of the physical amount of physical error is called fractional error, with the actual value of the physical amount of different observations.
So the relative error,
=∆a/a
6.Percentage errors
When fractional error is expressed in percent, it is called percentage error,
so the percentage error,
(∆a/a)×100
Combination of errors
(a).Compile and individual error
Let x, y and z be a three physical quantities.
where z=x+y and marginal errors respectively
±∆z, ±∆x, ±∆y
So,
(z±∆z)=(x±∆x)+(y±∆y)
(x+y±∆z)=(x±∆x)+(y±∆y)
±∆z=±∆x±∆y
Therefore,
maximum error in z
∆z=∆x+∆y
(b).Error in multiplication
Let z=x.y
(z±∆z)=(x±∆x).(y±∆y)
(xy±∆z)=xy±x.∆y±y∆x±∆x.∆y
Since ∆x,∆y are very small quantities. Hence their product ∆x.∆y will be a small quantity, which can be omitted.
±∆z=x.∆y±y∆x
±∆z/z=(x.∆y)x.y±(y∆x)/x.y
±∆z/z=±(∆y/y)±(∆x/x)
Therefore, the maximum fractional error in the value of z is,
|∆z/z|max=∆y/y+∆x/x
Hence percentage error,
{|∆z/z|max}×100=(∆y/y)×100+(∆x/x)×100


